JavaScript in 3D: an Introduction to Three.js
How to bring three dimensions to your next web app

Published on
Sep 23, 2019
Read time
10 min read
Introduction
Three.js is a powerful tool. It helps bring 3D design and animation to the browser in a performant and adaptable way. But it can be tricky to get started if you’ve never delved into the world of 3D programming before.
I had some basic experience playing with the Unity Game Engine and C#, but otherwise many of the concepts were new to me. I realised there weren’t many beginner-friendly resources out there, and so I decided to write this article. In it, we’ll look at the main elements of a Three.js scene, from meshes and material to geometries, loaders and more.
By the end of the article, you should have a solid understanding of the basic building blocks necessary to add an extra dimension to your next web project.
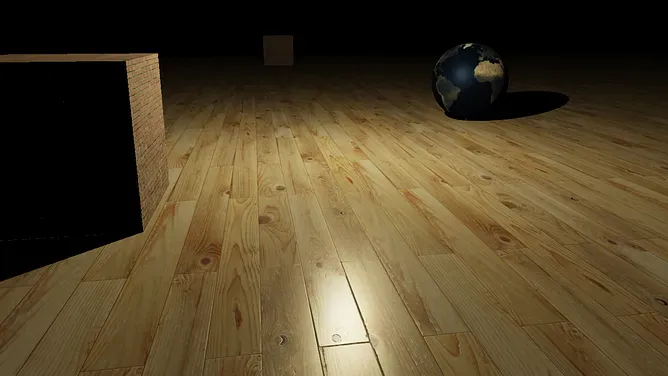
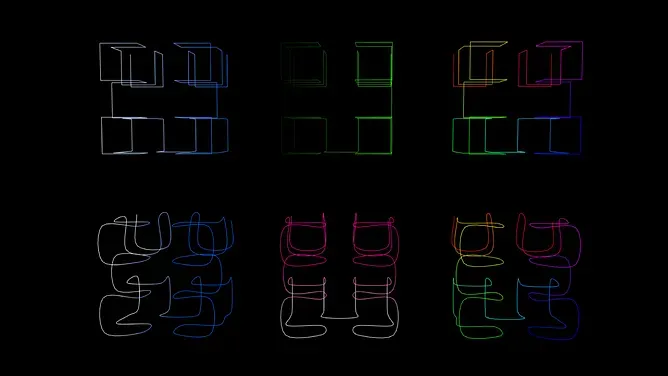
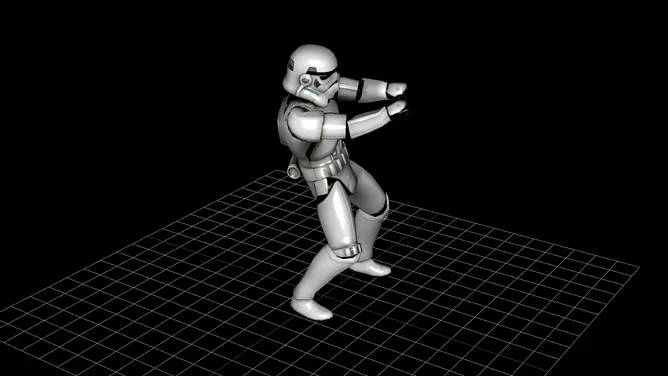
Three.js examples by Ben Houston, Thomas Diewald and StrykerDoesAnimation.
Vectors and boxes — the fundamental building blocks
Often, the two most important classes in Three.js are Vector3 and Box3. If you’re new to 3D, this stuff might sound a little abstract, but you’ll encounter them a lot!
Vector
The most basic 3D class, containing three numbers x, y and z. This can be used to represent a point in 3D space or a direction and length. For example:
const vect = new THREE.Vector3(1, 1, 1);
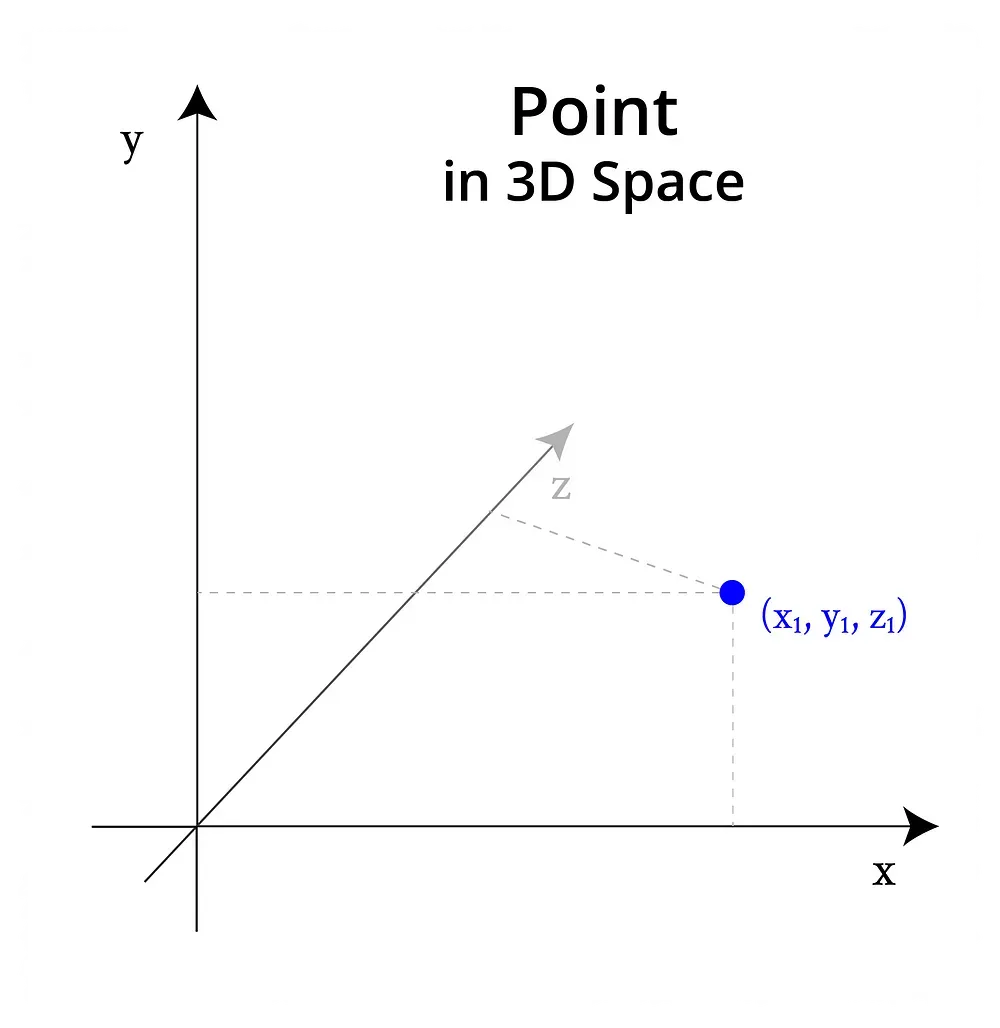
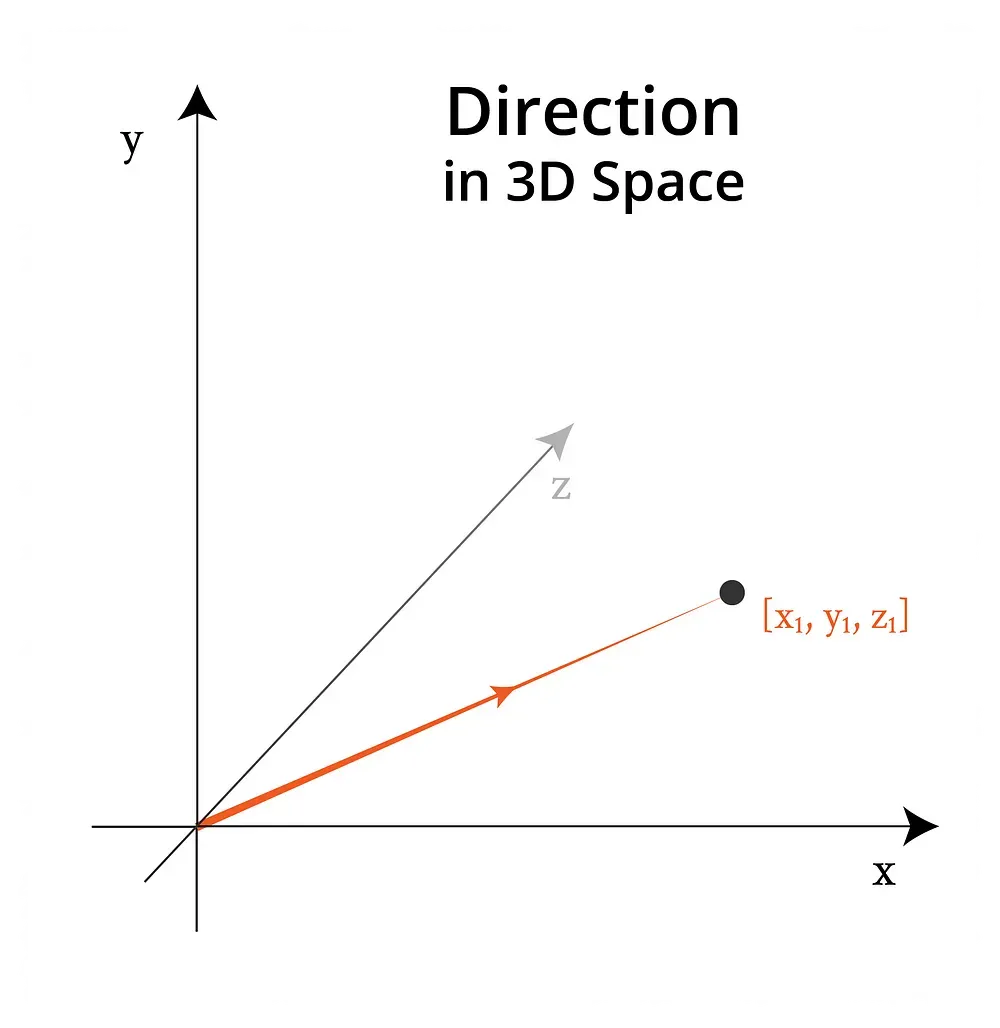
Points are locations in space. Vectors are displacements in space.
Lots of Three.js constructors take Vector3 objects as arguments, including the Box3 below.
Box
This class represents a cuboid (3D box). Its main purpose is to get the bounding box of other objects — that is, the smallest possible cuboid that a 3D object could fit in. Every Box3 is aligned to the world x, y and z axes.
Here’s how to create a box using a Vector3:
const vect = new THREE.Vector3(1, 1, 1);
const box = new THREE.Box3(vect);
And here’s how to create a box based on an existing 3D object:
const box = new THREE.Box3();
box.setFromObject(object);
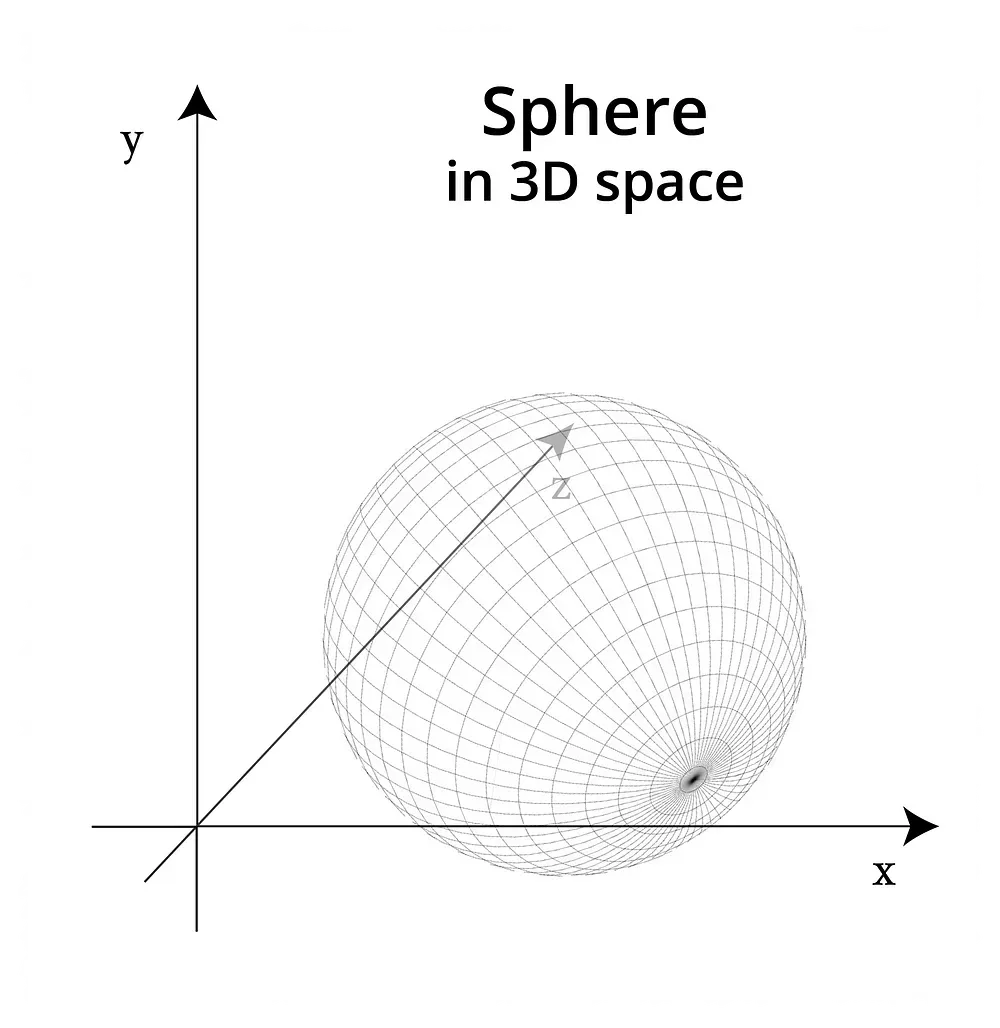
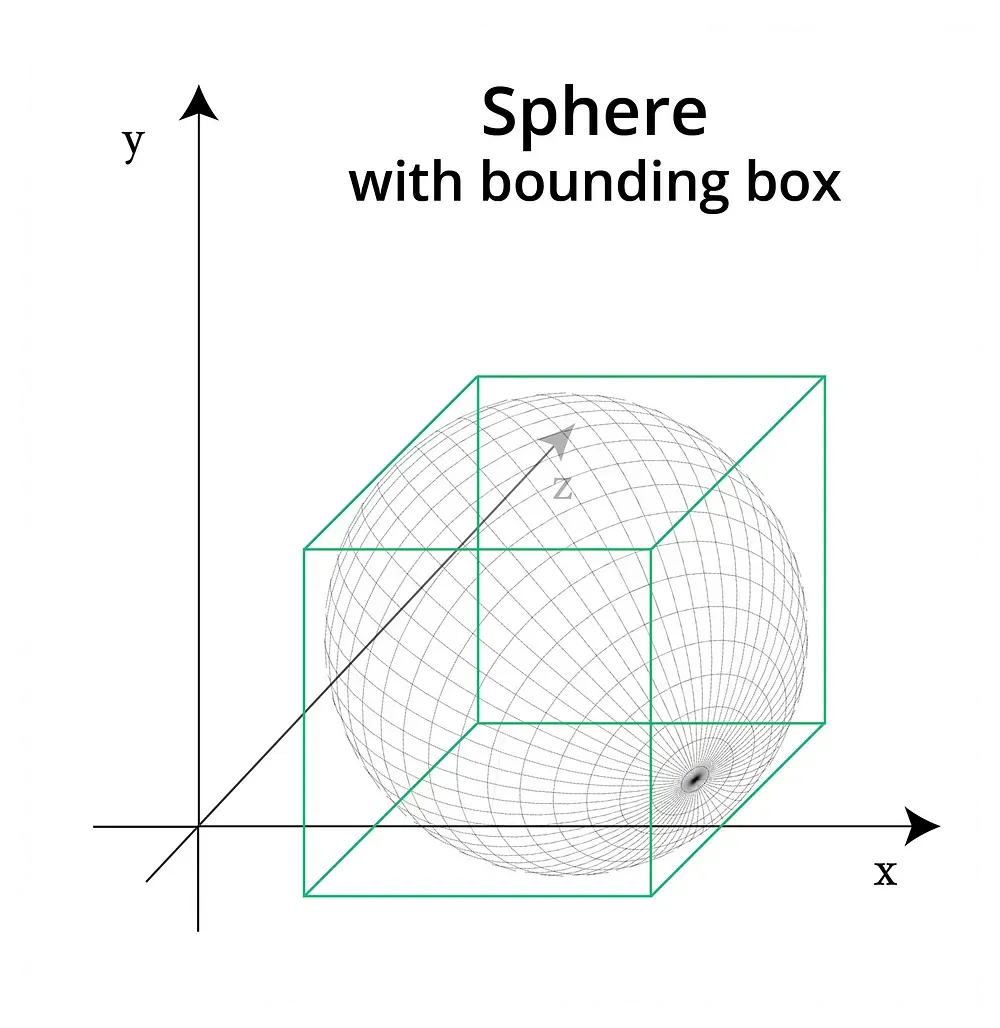
A sphere in 3D space. On the right, the sphere’s bounding box is shown.
Though you can create meshes without this knowledge, as soon as you start trying to move or manipulate your models, these classes will come in handy. Now, we’ll move away from the abstract to the things that we can see!
Meshes
In Three.js, the basic visual element in a scene is a Mesh. This is a 3D object made up of triangular polygons. It’s built using two objects:
- a
Geometry— which defines its shape, - a
Material— which defines its appearance.
These definitions can get a little more complicated (the Geometry, for example, can contain colour data), but that’s the main distinction.
Geometry
Depending on your use-case, you’ll either want to define a geometry within Three.js or import one from a file.
Using functions like THREE.TorusKnotGeometry, we can create complex-looking shapes with single lines of code. We’ll get to that in a moment, but first let’s cover a few simple shapes.
The simplest 3D shape, a cuboid or box, can be defined with a width, height and depth:
const geometry = new THREE.BoxGeometry(20, 20, 20);
See the Pen Three.js BoxGeometry by Bret Cameron (@BretCameron) on CodePen.
For a sphere, the minimum information we need to provide is the radius, widthSegments and heightSegments. The latter two variables tell us the number of triangles the model should use to represent the sphere: the higher the number, the smoother the appearance of the sphere:
const geometry = new THREE.SphereGeometry(20, 64, 64);
See the Pen Three.js SphereGeometry by Bret Cameron (@BretCameron) on CodePen.
If we want to make pointed or triangle shapes, one option is a cone. Its arguments are a mix of the arguments supplied to the previous two geometries. Below, we specify radius, height and radialSegments.
const geometry = new THREE.ConeBufferGeometry(5, 20, 32);
See the Pen Three.js ConeBufferGeometry by Bret Cameron (@BretCameron) on CodePen.
These are just a few of the most common shapes. Three.js comes with lots of built-in geometries, which you should check out in the docs. For most of this tutorial, we’ll use a more interesting shape, built using the TorusKnotGeometry method.
Why this shape looks the way that it does is beyond the scope of this tutorial, but I encourage you to play around with the values, as you can make some very interesting objects in just a single line of code!
const geometry = new THREE.TorusKnotGeometry(10, 1.3, 500, 6, 6, 20);
See the Pen Three.js TorusKnotGeometry by Bret Cameron (@BretCameron) on CodePen.
Materials
Geometries define the shape of our 3D objects, but not their appearance. For that, we need to add a material
Three.js comes with 10 mesh materials, each with its own advantages and customisable properties. We’ll look into a handful of the most useful ones.

MeshNormalMaterial
We’ll start with the MeshNormalMaterial, the multi-coloured material we’ve used in the examples so far. It maps the normal vectors to RGB colours: in other words, it uses colour to distinguish the position of the vector in 3D space.
const material = new THREE.MeshNormalMaterial();
Note that, if you want to change the colours of MeshNormalMaterial you could simply use a CSS filter, and alter the hue: e.g. filter: hue-rotate(90deg).
In my experience, the MeshNormalMaterial is most useful for getting up-and-running quickly. For more control over the look of your objects, it’s best to use something else.
MeshBasicMaterial
If you want your object to have a uniform colour, you can use MeshBasicMaterial, as it is not affected by lights. I find this useful for wireframes. To use wireframe mode, simply pass { wireframe: true } as an argument.
const material = new THREE.MeshBasicMaterial({
  wireframe: true,
  color: 0xdaa520,
});
See the Pen Three.js MeshBasicMaterial by Bret Cameron (@BretCameron) on CodePen.
The disadvantage of the basic material is that it offers no clues about the depth of the material. Every material has options for wireframing, but a performant solution that includes depth is the MeshDepthMaterial.
MeshLambertMaterial
This is the first material which is affected by lights, so to see what we’re doing we’ll need to add some light to our scene. In the code below, we’ll add to spotlights, with a hint of yellow to create a warmer effect:
const scene = new THREE.Scene();

const frontSpot = new THREE.SpotLight(0xeeeece);
frontSpot.position.set(1000, 1000, 1000);
scene.add(frontSpot);

const frontSpot2 = new THREE.SpotLight(0xddddce);
frontSpot2.position.set(-500, -500, -500);
scene.add(frontSpot2);
Now let’s add the material for our shape. As it looks a bit like a piece of jewellery, I thought I’d go for a gold-ish colour. The other property, emissive, is the colour the object emits from itself (without any light source). Often, it works best as a dark colour — such as a dark shade of grey, like below:
const material = new THREE.MeshLambertMaterial({
  color: 0xdaa520,
  emissive: 0x111111,
});
See the Pen Three.js MeshLambertMaterial by Bret Cameron (@BretCameron) on CodePen.
As you can see in the example below, the colour is more-or-less correct, but the way it’s interacting with the light doesn’t make for the most realistic appearance. For that, we’ll need to use the MeshPhongMaterial or the MeshStandardMaterial.
MeshPhongMaterial
This material offers a compromise between performance and appearance, and therefore it’s a good middle-ground for applications that need to be performant while also achieving a higher level of quality than the MeshLambertMaterial.
We can now alter a new property, specular, which defines the brightness and colour of the surface’s reflectivity. While the emissive property is usually dark, the specular one often works best as a light colour. Below, we’re using a light grey:
const material = new THREE.MeshPhongMaterial({
  color: 0xdaa520,
  emissive: 0x000000,
  specular: 0xbcbcbc,
});
See the Pen Three.js MeshPhongMaterial by Bret Cameron (@BretCameron) on CodePen.
Visually, the above image reflects the light in a much more convincing way, but it’s still not perfect. The white light is a bit too bright, and the material looks more rubbery than metallic (our desired effect). We can get a better result using the MeshStandardMaterial.
MeshStandardMaterial
This is the highest-accuracy of Three.js’s materials, although it comes at the expense of greater processing power. MeshStandardMaterial comes with a couple of additional properties — metalness and roughness, both of which take values between 0 and 1.
The metalness property alters the way the object reflects so that it’s closer in nature to a metal. This is because conductive materials, like metals, have different reflective properties to dielectric materials, like ceramics.
roughness adds a further layer of customisation. You can think of it as the opposite of glossiness: a value of 0 is extremely glossy, while a value of 1 is extremely rough (meaning very little light is reflected).
const material = new THREE.MeshStandardMaterial({
  color: 0xfcc742,
  emissive: 0x111111,
  specular: 0xffffff,
  metalness: 1,
  roughness: 0.55,
});
See the Pen Three.js MeshStandardMaterial by Bret Cameron (@BretCameron) on CodePen.
This is definitely the most realistic result but bear in mind that it is more resource-intensive.
The materials discussed above are the ones I’ve encountered most commonly, but to see what other options are available, head over to the docs.
Loaders
As we’ve discussed, it’s possible to manually define the geometry of your meshes. However, in practice, many people will often prefer to import their geometries from 3D files. Luckily, Three.js has plenty of supported loaders, covering most of the major 3D file formats.
The basic ObjectLoader loads a JSON resource, using the JSON Object/Scene format. But most loaders need to be imported manually. You can find a list of supported loaders in this GitHub directory, and import them like so, using the GitHub file path. Here are imports for several common formats:
// GLTF
import { GLTFLoader } from 'three/examples/jsm/loaders/GLTFLoader.js';

// OBJ
import { OBJLoader } from 'three/examples/jsm/loaders/OBJLoader.js';

// STL
import { STLLoader } from 'three/examples/jsm/loaders/STLLoader.js';

// FBX
import { FBXLoader } from 'three/examples/jsm/loaders/FBXLoader.js';

// 3MF
import { 3MFLoader } from 'three/examples/jsm/loaders/3MFLoader.js';
The recommended file format for online viewing is GLTF, on the grounds that it’s ‘focused on runtime asset delivery, compact to transmit and fast to load’.
Of course, there may be reasons to prefer a specific file (for example, if the quality is your priority, or if you need to accurately represent files for 3D printing). But if you can, you’ll likely get the best performance online by importing your files in the GLTF format.
import { GLTFLoader } from "three/examples/jsm/loaders/GLTFLoader.js";
import model from "../models/sample.gltf";

let loader = new GLTFLoader();

loader.load(
  model,
  function (geometry) {
    // if the model is loaded successfully, add it to your scene here
  },
  undefined,
  function (err) {
    console.error(err);
  }
);
Bringing it all together
One of the reasons that Three.js can seem intimidating is that, if you’re building something from scratch, a fair amount of code is required just to see something on your screen. In every example so far, we’ve needed to create a scene and a camera. To keep things simpler, I’ve kept this code out of the way at the bottom, but we’ll now look at bringing everything together.
The way you order and organise your code is up to you. In simpler examples, like the ones in these articles, it makes sense to include all the Three.js code in one place. But, in practice, it can be useful to divide the separate elements to make the codebase easier to manage and scale.
For simplicity, we’ll look at the elements you’ll need to render a single object and we’ll do so in a single JavaScript file. Here’s an outline to get you started:
// Import dependencies
import * as THREE from "three";
import { OrbitControls } from "three/examples/jsm/controls/OrbitControls.js";

// Create Scene
const scene = new THREE.Scene();
scene.background = new THREE.Color(0x282c34);

// Define a camera, set it to fill the browser window and position it
const camera = new THREE.PerspectiveCamera(
  75,
  window.innerWidth / window.innerHeight,
  0.1,
  10000
);
camera.position.z = 5;

// Define a renderer, and set it to fill the browser window
const renderer = new THREE.WebGLRenderer();
renderer.setSize(window.innerWidth, window.innerHeight);

// Get an element from the DOM and append renderer.domElement to it
document.getElementById("threejs").appendChild(renderer.domElement);

// Add controls, targetting the same DOM element
let controls = new OrbitControls(camera, document.getElementById("threejs"));
controls.target.set(0, 0, 0);
controls.rotateSpeed = 0.5;
controls.update();

// Define (or import) your object's geometry
const geometry = new THREE.TorusKnotGeometry(10, 1.3, 500, 6, 6, 20);

// Define your object's material
const material = new THREE.MeshStandardMaterial({
  color: 0xfcc742,
  emissive: 0x111111,
  specular: 0xffffff,
  metalness: 1,
  roughness: 0.55,
});

// Create the mesh, scale it and add it to the scene
const mesh = new THREE.Mesh(geometry, material);

mesh.scale.x = 0.1;
mesh.scale.y = 0.1;
mesh.scale.z = 0.1;

scene.add(mesh);

// Create lights, position them, and add them to the scene
const frontSpot = new THREE.SpotLight(0xeeeece);
const frontSpot2 = new THREE.SpotLight(0xddddce);

frontSpot.position.set(1000, 1000, 1000);
frontSpot2.position.set(-500, -500, -500);

scene.add(frontSpot);
scene.add(frontSpot2);

// Create an animate function, which will allow you to render your scene and define any movements
const animate = function () {
  requestAnimationFrame(animate);

  mesh.rotation.x += 0.005;
  mesh.rotation.y += 0.005;
  mesh.rotation.z += 0.005;

  renderer.render(scene, camera);
};

// Call the animate function
animate();
Should I use a framework?
Finally, it’s worth discussing whether or not to use a framework-specific incarnation of Three.js. Currently, the most popular of these is the fantastic react-three-fiber, for React. For users of React, there are some big advantages to using a package like this — namely, you get to keep a component-based structure, which allows you to easily manage and re-use code.
But, for beginners, I recommend starting with regular, vanilla Javascript. This is because most online material written about Three.js refers to Three.js in vanilla JavaScript. Based on my experience as a learner, it could be confusing to learn Three.js via a package if — for example — you constantly have to translate Three.js objects and methods to components and props. (But once you’re more comfortable with Three.js, use whatever packages you like!)
How to add vanilla Three.js to a framework
Three.js will give you an HTML object (often called renderer.domElement) which you can append to any HTML element in your app. So, for example, if you have a div with id="threejs", you can simply include the following in your Three.js code:
document.getElementById("threejs").appendChild(renderer.domElement);
Some frameworks have a preferred way for you to access DOM nodes — such as a ref in React, an $ref in Vue or a ngRef in Angular — which come with certain advantages over querying elements directly from the DOM. As an example, we’ll now look at a quick implementation strategy for React.
A strategy for React
If you use React, here’s one way of incorporating a regular Three.js file into one of your components. In one file, ThreeEntryPoint.js, we’ll hold our vanilla Three.js code:
export default function ThreeEntryPoint(sceneRef) {
  let renderer = new THREE.WebGLRenderer();
  // ...
  sceneRef.appendChild(renderer.domElement);
}
We should export this as a function, which takes one argument: a React ref to an element in our React component. We can now make our component, ThreeContainer.js:
import React, { Component } from "react";
import ThreeEntryPoint from "./threejs/ThreeEntryPoint";

export default class ThreeContainer extends Component {
  componentDidMount() {
    ThreeEntryPoint(this.scene);
  }

  render() {
    return (
      <>
        <div ref={(element = this.scene = element)} />
      </>
    );
  }
}
The imported ThreeEntryPoint function should go inside our componentDidMount method, and pass our new div as its argument, using refs.
For an example of this approach in action, feel free to clone the following repository and try it for yourself: https://github.com/BretCameron/three-js-sample.
Conclusion
There’s a lot more that could be said about Three.js, but I hope this article has given you enough information to get started with this powerful technology. When I began learning Three.js, I couldn’t find any resource quite like this article, so I hope that I have helped make the technology more accessible to first-timers.
Related articles
You might also enjoy...

Switching to a New Data Structure with Zero Downtime
A Practical Guide to Schema Migrations using TypeScript and MongoDB
7 min read
Feb 2025
How to Automate Merge Requests with Node.js and Jira
A quick guide to speed up your MR or PR workflow with a simple Node.js script
7 min read
Nov 2024
Automate Your Release Notes with AI
How to save time every week using GitLab, OpenAI, and Node.js
11 min read
Nov 2024